Are you holding a party and need to make Halloween cards for your guests? No problem! let's make Halloween Party Invitation Cards and have fun!
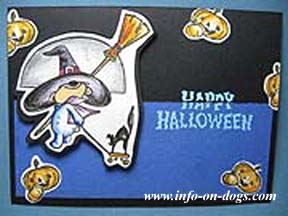
Yes! Why not make your own Halloween cards to impress your guests? It only takes you 15 to 20 minutes top! It will be fun for the kids too! Take this opportunity to do this Halloween art project with your kids and let them learn the fun of card making! Enjoy the Halloween cards making!
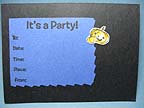
Back of the invitation card with the wordings - It's a Party - To :Date :Time :Place : From :

tools you need to make the halloween invitation card......
- papers :
one 7in x 5in 220g black color art paper
one 4in x 4in 220g black color art paper
one 2.5in x 6in 80g blue craft paper
one 3.5in x 3.5in 80g blue craft paper for the back of the card
one about 4in x 10in 80g or 100g white color paper
-rubber stamp : "Happy Halloween" by All Night Media #4263L "More Say It With Stamps"
- clear stamp : #500030 by New Stamp On The Block
- letter stamps : any type of font
- adhesive :
non toxic glue
1in of double sided tape cut equally into six pieces
- coloured pencils
- pigment or archival ink pad :
black color ink pad by Versa
light blue or white color ink pad by Versa
- a pair of scissors
- a heat gun for embossing (optional)
- light blue embossing power by Ranger (optional)
**Please note that this craft project is suitable for adults and kids of 8 years old and above under adult's supervision when doing step 8 & 9.
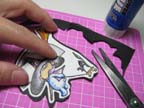
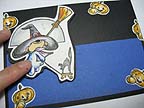
1. Tap the pigment ink on the clear stamp, colour the picture then cut the outline, with glue paste it on a 4in x 4in black paper, cut the outline.
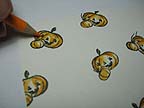
2. Stamp 6 pumpkins pictures with black color pigment ink, stamp 3 of them half of the size at the edge of the paper as shown. Colour them.
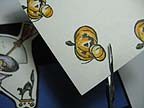
3. Outline and cut them out.
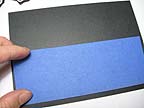
4. On the 5in x 7in black paper, paste a 2.5in x 6in blue paper on it as shown.
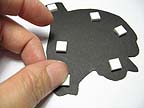
5. Paste the double sided tape on the back of the picture to give the 3D effect.
6. The paste it on the paper, also paste the pumpkin pictures randomly to make it looks more "natural".
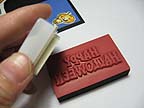
7. Tap the light blue or white pigment ink on the rubber stamp then stamp it on the card, position it as shown on the next step.
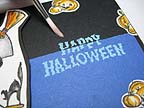
8. Apply embossing power, then use fine brush to clear away any dust power left behind before you do the embossing. (if you do not have embossing powder and heat gun for crafts, skip steps 8 and 9)
.....more on how to apply the correct embossing techniques 9. Emboss it with a heat gun. (adult's supervision is advised when handling any electrical applicators)
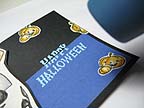
10. Cut the adge of the 3.5in x 3.5in blue color craft paper with wavy scissors. If you don't have the craft scissors then just use the normal scissors. Stamp the wordings then paste it at the back of the card. Paste a picture of the pumpkin at the right top corner of the blue color paper. Here you are the cute Halloween card!!
Check it out for other interesting crafts other than Halloween cards!

Learn about craft embossing techniques
Interested to know the next craft projects? Click here to subscribe and we will keep you updated
Homepage

