How would you like to handmade dog tags with cute doggy and other animal pictures? Make your own dog tags and other gift tags for your loved ones!
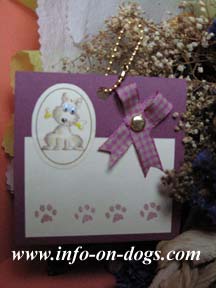 Make some cute and adorable dog tags! Then hang them on the drawer handle, dog food container, cabinet....etc. Or make some nice gift tags for your love ones. It's easy and fun! Although I focus mostly on dogs and other animals but I do not limit myself to use other nice pictures. I will share with you different techniques of making tags with different kind of materials. Enjoy your tags making!

tools you need to make the halloween invitation card......
- papers :
one 80g 3in x 2.5in cream color art paper
one 80g 2.5in x 2in cream color art paper for the doggy picture
two 200g 4in x 4in mauve color art papers
- adhesive : non toxic art glue
- rubber stamp : ALL NIGHT MEDIA - 562C
- pair of artificial 3D eyes (not suitable for children below 6 years old)
- embellishment :
one golden 0.4mm brad (not suitable for children below 6 years old)
one 3in golden chain with clap
- glossy accents (optional) by Ranger
- one brown pigment brush or marker by ZIG or Sakura
- brown color pigment ink pad by Versa
- coloured pencils : cream, light brown, baby blue
- hole puncher
- ribbon : 6in mauve color
- a pair of scissors
**Please note that this craft project is suitable for adults and kids of 7 years old and above under adult's supervision when doing step 9 & 10.
Making dog tag with stamping technique!
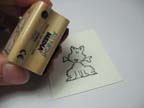 1. Tap the black color pigment ink on the stamp. Then stamp on a light yellow or cream color paper.
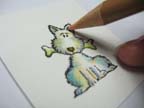 2. Colour the picture with color pencils and highlight it with marker if necessary.
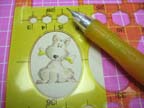 3. Use a pencil or marker to draw the outline of an oval shape around the doggy picture then cut it out.
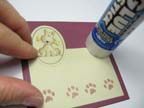 4. Prepare a cream color paper of 3in x 2.5in and a square 4in x 4in of 200g mauve color paper. With glue, paste the cream color paper on the mauve color paper followed by the oval shape of the dog picture. Position them as shown.
 5. Tap the brown color pigment inkpad on the "paws" stamp and stamp it at the bottom of the cream paper as shown. Use darker brown marker to highlight the "paws" to make it looks like 2D.
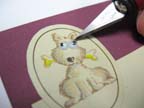 6. With the craft glue, paste the artificial eyes on the picture of the dog. It does not only enhance the eyes with the 3D effect, it also makes the eyes looks cute!
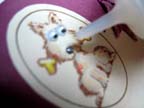 7. This step is optional, if you have the "glossy accents", just apply a little on the doggy's nose to make it looks dimensional. If you don't have you may skip this step.
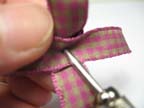 9. Cross the ribbon as shown. Poke a hole thru in the middle of the ribbon. Put the ribbon on top of the tag and put a golden color brad thru the hole of the ribbon and the tag. Turn to the back of the tag, bend the "legs" of the brad one to the left and one to the right, flatten them. Cut another piece of mauve color paper of 4in x 4in, apply glue and paste it at the back of the tag to cover up the "legs" of the brad. (adult's supervision is advised when handling shape object)
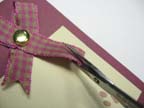 10. Turn the tag to the front, at the end of the ribbon, cut a "V" shape to make the ribbon looks nicer. At the middle top of the tag, use hole puncher to make a hole, string the hole with ribbon or in this sample, I use golden color chain to match with the brad. And here you are............a dog tag is done! Congrats!
Check it out for other fun and interesting crafts other than dog tags
Interested to know the next craft projects? Click here to subscribe and we will keep you updated
Homepage

If you think this page may help other dog lovers, share it.....!
Would you prefer to share this page with others by linking to it?
- Click on the HTML link code below.
- Copy and paste it, adding a note of your own, into your blog, a Web page, forums, a blog comment,
your Facebook account, or anywhere that someone would find this page valuable.
 Make some cute and adorable dog tags! Then hang them on the drawer handle, dog food container, cabinet....etc. Or make some nice gift tags for your love ones. It's easy and fun! Although I focus mostly on dogs and other animals but I do not limit myself to use other nice pictures. I will share with you different techniques of making tags with different kind of materials. Enjoy your tags making!

 1. Tap the black color pigment ink on the stamp. Then stamp on a light yellow or cream color paper.
 2. Colour the picture with color pencils and highlight it with marker if necessary.
 3. Use a pencil or marker to draw the outline of an oval shape around the doggy picture then cut it out.
 4. Prepare a cream color paper of 3in x 2.5in and a square 4in x 4in of 200g mauve color paper. With glue, paste the cream color paper on the mauve color paper followed by the oval shape of the dog picture. Position them as shown.
 5. Tap the brown color pigment inkpad on the "paws" stamp and stamp it at the bottom of the cream paper as shown. Use darker brown marker to highlight the "paws" to make it looks like 2D.
 6. With the craft glue, paste the artificial eyes on the picture of the dog. It does not only enhance the eyes with the 3D effect, it also makes the eyes looks cute!
 7. This step is optional, if you have the "glossy accents", just apply a little on the doggy's nose to make it looks dimensional. If you don't have you may skip this step.
 9. Cross the ribbon as shown. Poke a hole thru in the middle of the ribbon. Put the ribbon on top of the tag and put a golden color brad thru the hole of the ribbon and the tag. Turn to the back of the tag, bend the "legs" of the brad one to the left and one to the right, flatten them. Cut another piece of mauve color paper of 4in x 4in, apply glue and paste it at the back of the tag to cover up the "legs" of the brad. (adult's supervision is advised when handling shape object)
 10. Turn the tag to the front, at the end of the ribbon, cut a "V" shape to make the ribbon looks nicer. At the middle top of the tag, use hole puncher to make a hole, string the hole with ribbon or in this sample, I use golden color chain to match with the brad. And here you are............a dog tag is done! Congrats!
